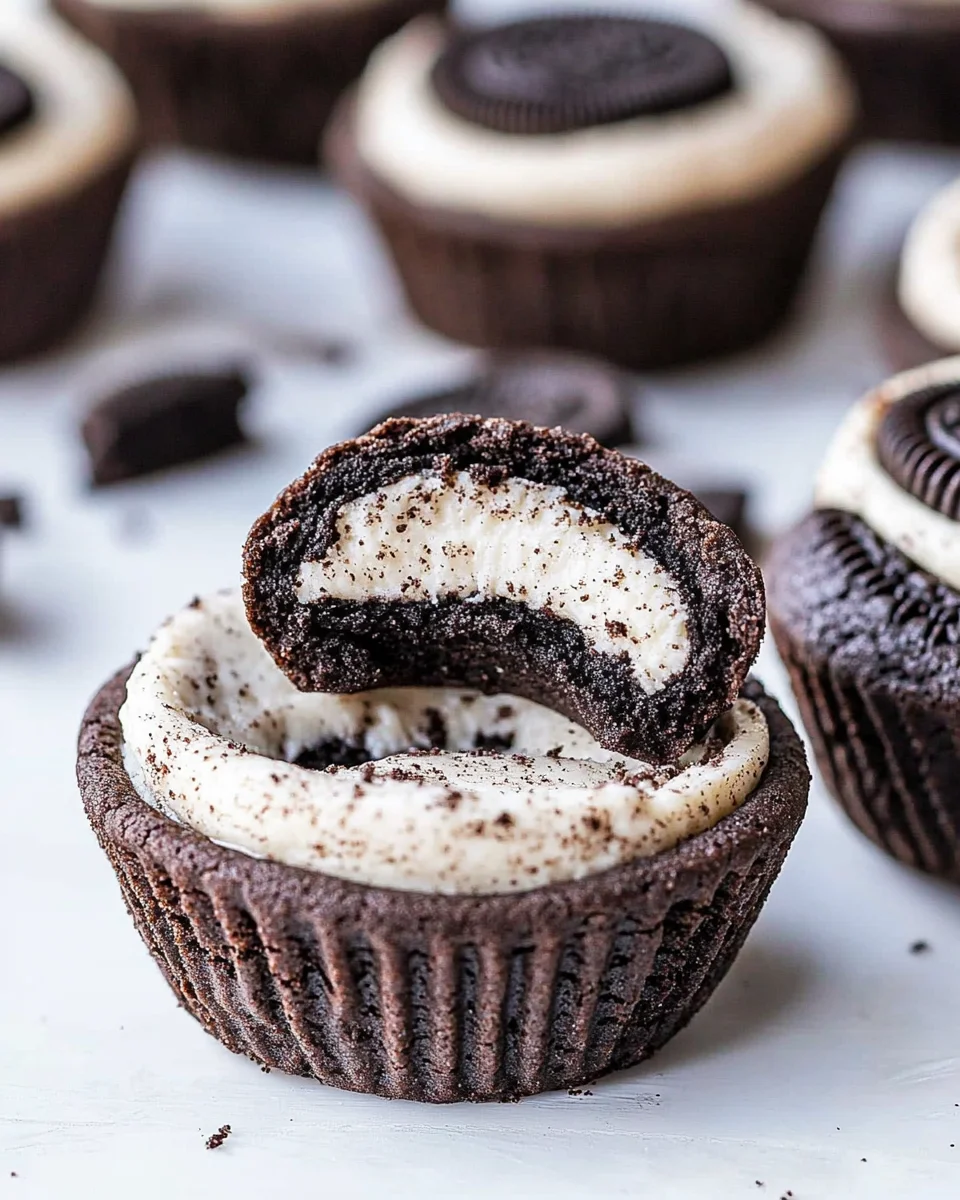
Oreo Cheesecake Cookie Cups
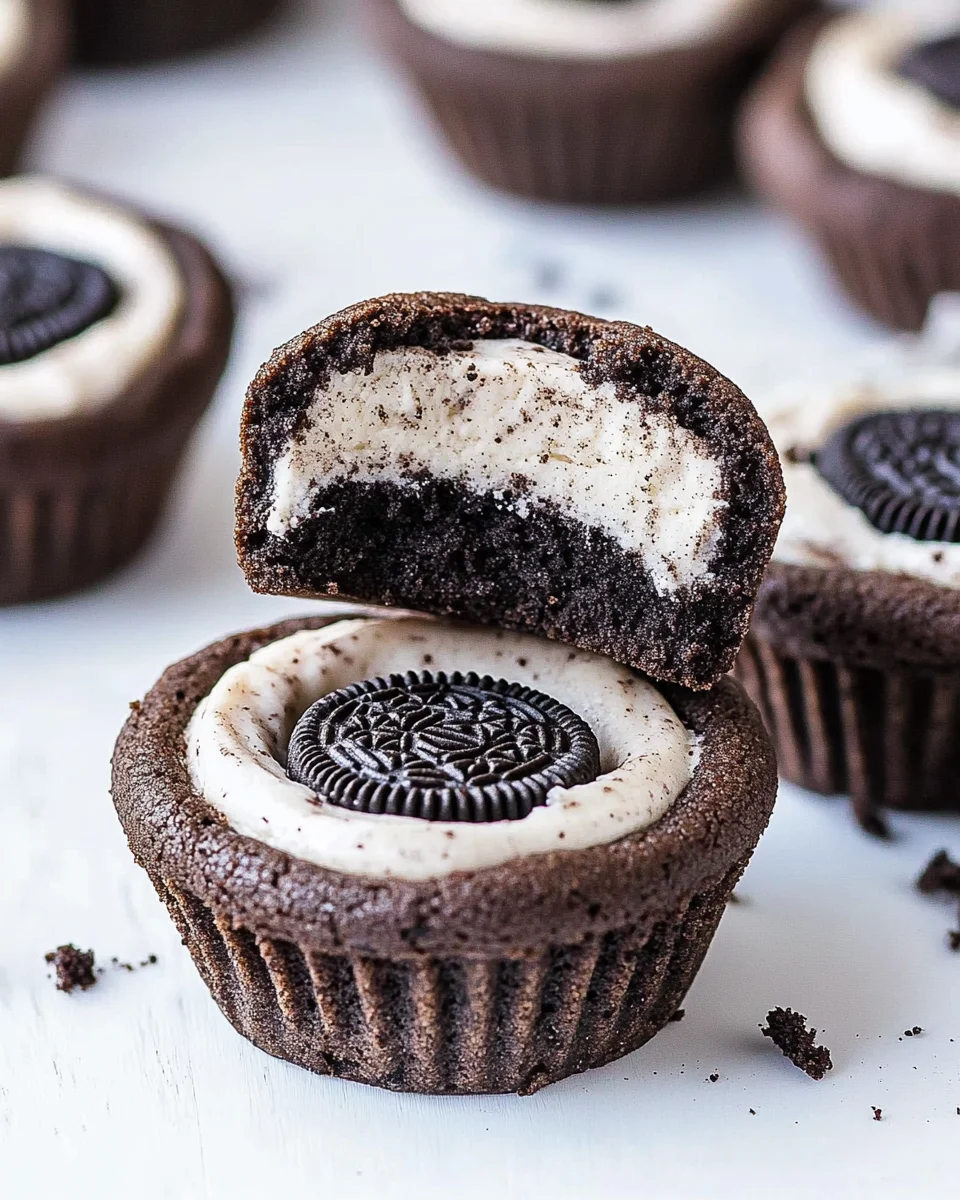
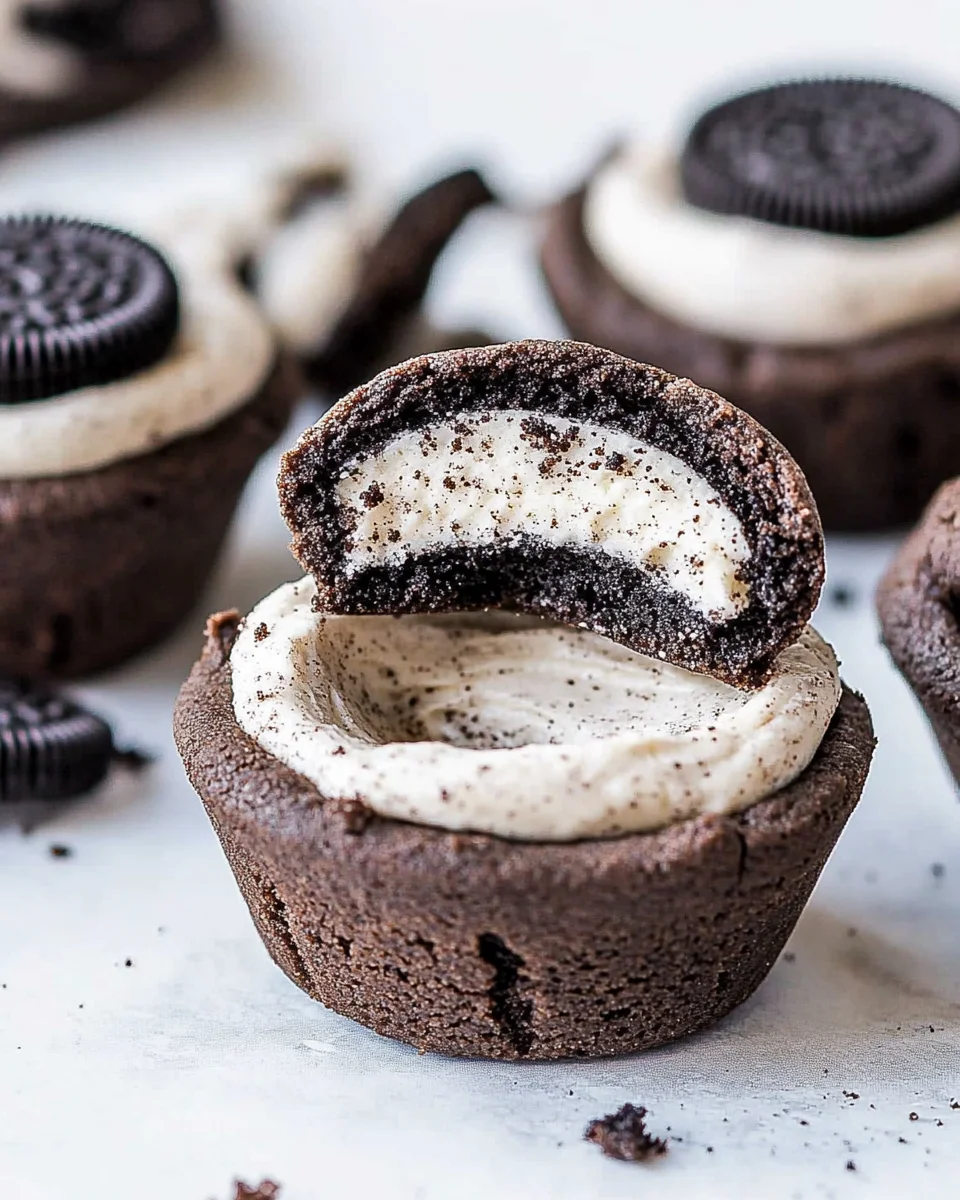
These Oreo Cheesecake Cookie Cups are the perfect dessert for any Oreo enthusiast. With a rich chocolate cookie base and a fluffy Oreo cheesecake filling, they are great for parties, holidays, or just a delightful treat at home. These little bites of heaven blend flavors and textures that will impress your friends and family.
Why You’ll Love This Recipe
- Decadent Flavor: The combination of chocolate cookie cups with creamy Oreo cheesecake filling makes each bite irresistible.
- Easy to Make: With straightforward instructions and common ingredients, these cookie cups can be whipped up quickly.
- Perfect for Any Occasion: Whether it’s a birthday party, holiday gathering, or a cozy night in, these treats fit right in.
- Customizable: Add additional toppings like whipped cream or more Oreo crumbs to make them your own!
- Great for Sharing: Each recipe yields 20 cups, making it easy to share with friends and family.
Tools and Preparation
Before you begin baking your Oreo Cheesecake Cookie Cups, gather the essential tools and equipment. Having everything ready will streamline the process.
Grab This Chef Knife Now - Almost Gone!
- Stays Razor-Sharp: Ice-hardened blade keeps its edge longer than ordinary knives
- Superior Grip Control: Unique finger hole design gives you perfect balance and safety
- Built to Last a Lifetime: Premium stainless steel blade with elegant beech wood handle
Customer Reviews ★★★★★
Essential Tools and Equipment
- Stand mixer
- Muffin tins
- Whisk
- Mixing bowls
- Cookie scoop
Importance of Each Tool
- Stand mixer: Ideal for achieving fluffy cream cheese filling quickly without effort.
- Muffin tins: Essential for shaping the cookie cups perfectly; they provide uniformity in size and shape.
- Whisk: Perfect for whipping heavy cream to stiff peaks, ensuring a light texture.
Ingredients
For Chocolate Cookie Cups
- 2 cups all-purpose flour
- ¼ cup Dutch-processed cocoa powder, sifted
- ¼ cup black cocoa powder, sifted
- 1 teaspoon baking soda
- ½ teaspoon salt
- 1 cup unsalted butter, room temperature
- ½ cup granulated sugar
- 1 cup light brown sugar, packed
- 2 large eggs, room temperature
- 1 teaspoon vanilla extract
For Oreo Cheesecake Filling
- 1 cup heavy whipping cream, chilled
- 8 oz full-fat cream cheese, softened
- ½ cup granulated sugar
- ¾ cup Oreo cookie crumbs
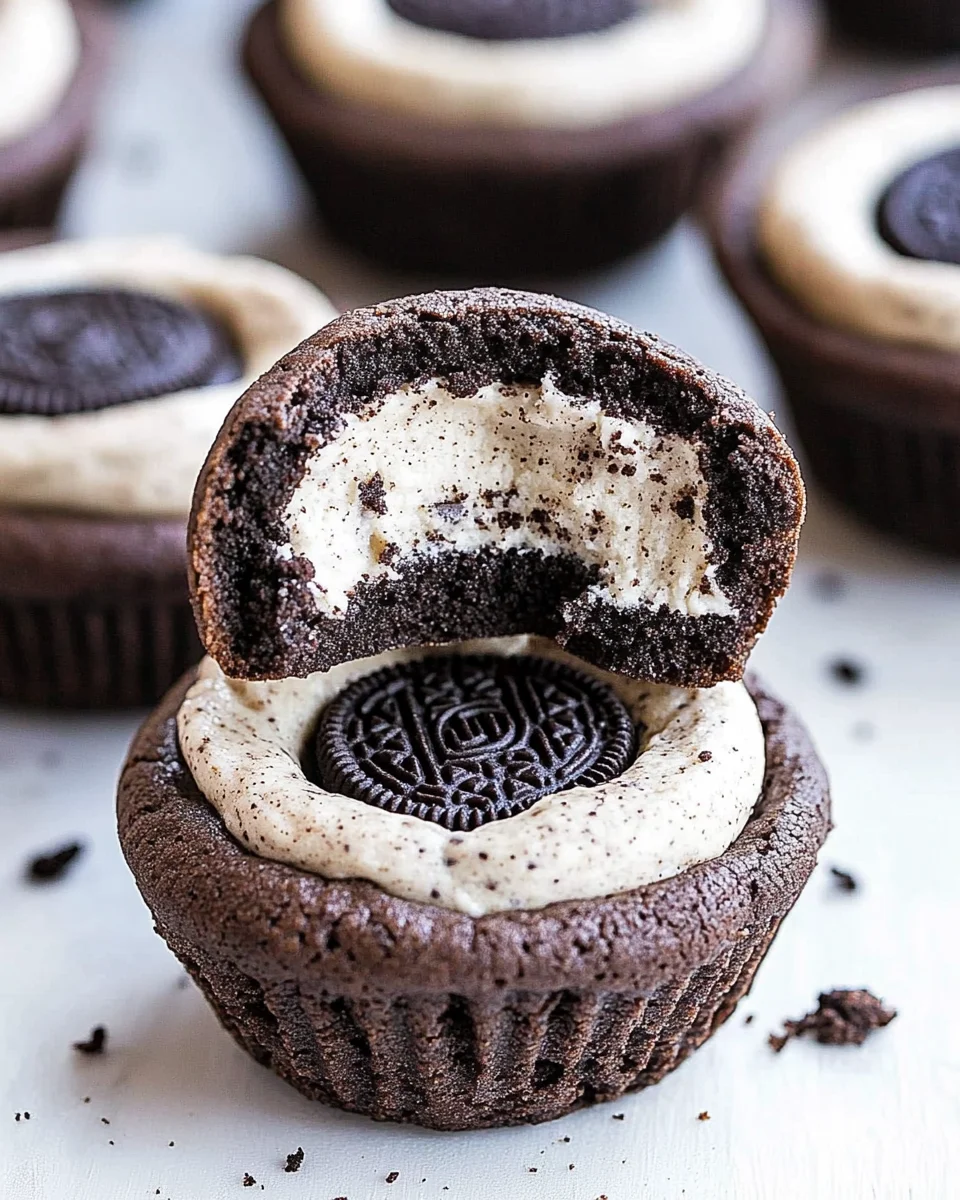
How to Make Oreo Cheesecake Cookie Cups
Step 1: Preheat the Oven
Preheat your oven to 350°F (175°C). Spray two standard muffin tins with nonstick spray to prevent sticking.
Step 2: Make the Cookie Dough
- In a bowl, whisk together the flour, Dutch cocoa, black cocoa, baking soda, and salt. Set aside.
- In the bowl of your stand mixer, beat the butter and sugars on medium-high speed until light and fluffy (about 2–3 minutes).
- Reduce speed and add eggs one at a time. Then add vanilla extract and mix until combined.
- Gradually add dry ingredients to the wet mixture and mix until just combined.
Step 3: Shape the Cookie Cups
- Using a large cookie scoop (about 3 tablespoons), scoop dough into each muffin cup.
- Press down gently to flatten each scoop.
- Bake for 10–13 minutes or until edges are set but centers remain soft.
Step 4: Create Wells in Cookies
After removing them from the oven:
1. Immediately press down the center of each cookie using a small jar or spoon to create wells for filling.
2. Allow cookies to cool in the pan for 10 minutes before gently twisting each cookie to loosen it.
3. Cool on a wire rack completely.
Step 5: Make the Cheesecake Filling
- Whip cold heavy cream in a chilled bowl until stiff peaks form; set aside.
- In another bowl, beat softened cream cheese with sugar until smooth.
- Add Oreo crumbs and mix well.
- Fold in whipped cream gently until light and fluffy.
Step 6: Fill the Cookie Cups
Pipe or spoon the cheesecake filling into each cooled cookie cup.
Refrigerate for 1–2 hours until set.
Step 7: Serve
Sprinkle with additional Oreo crumbs before serving if desired.
Enjoy your homemade Oreo Cheesecake Cookie Cups!
How to Serve Oreo Cheesecake Cookie Cups
These delightful Oreo Cheesecake Cookie Cups can be enjoyed in various ways, making them a versatile treat for any occasion. Whether you’re hosting a party or simply indulging at home, here are some creative serving suggestions.
Individual Desserts
- Serve Chilled: Refrigerate the cookie cups before serving for a refreshing treat.
- Garnish with Whipped Cream: Top each cup with a dollop of whipped cream for extra creaminess.
Party Platter
- Mix and Match: Arrange the cookie cups alongside other desserts for an appealing dessert table.
- Themed Decorations: Use Oreo-themed decorations for a fun presentation at parties.
Pairing Suggestions
- Serve with Milk: A classic pairing that enhances the chocolate flavor of the cookie cups.
- Coffee Complement: Enjoy with a cup of coffee or espresso for a delightful afternoon treat.
How to Perfect Oreo Cheesecake Cookie Cups
To ensure your Oreo Cheesecake Cookie Cups turn out perfectly every time, consider these helpful tips.
- Bold Measurement Accuracy: Measure your ingredients accurately for consistent results.
- Bold Room Temperature Ingredients: Use room temperature butter and eggs for better mixing and texture.
- Bold Don’t Overbake: Remove the cookie cups from the oven while they’re still slightly soft in the center to avoid dryness.
- Bold Chill Before Filling: Allow the cookie cups to cool completely before adding the cheesecake filling to prevent melting.
- Bold Quality Ingredients: Use high-quality cream cheese and Oreos for the best flavor.
Best Side Dishes for Oreo Cheesecake Cookie Cups
These cookie cups pair wonderfully with various side dishes, enhancing your dessert experience. Here are some great options to consider.
- Fresh Fruit Salad: A light and refreshing contrast to the rich flavors of the cookie cups.
- Chocolate Fondue: Create a fun dessert station where guests can dip their cookie cups into warm chocolate.
- Ice Cream Scoop: Vanilla or cookies and cream ice cream complements both texture and taste.
- Mini Fruit Tarts: These add a touch of elegance and freshness that pairs well with chocolatey desserts.
- Nutty Trail Mix: A crunchy, savory side that balances the sweetness of the cookie cups nicely.
- Cheese Platter: A selection of cheeses adds sophistication and variety to your dessert table.
Common Mistakes to Avoid
These tips will help you create the perfect Oreo Cheesecake Cookie Cups without any hiccups.
- Ignoring the cookie base: The chocolate cookie cups need to be baked just right. Make sure not to over-bake them; they should be soft in the center when you take them out of the oven.
- Skipping the chilling step: Allowing the cheesecake filling to chill is crucial. If you skip this, your filling might not set properly and can become runny.
- Using cold ingredients: For a smooth cheesecake filling, ensure your cream cheese is softened at room temperature. Cold cream cheese can lead to lumps in your filling.
- Not measuring accurately: Baking is a science. Use measuring cups and spoons for all ingredients to maintain proper ratios and achieve the desired texture and flavor.
- Overmixing the cheesecake filling: When folding in whipped cream, do it gently. Overmixing can deflate the air you’ve incorporated, making your filling dense rather than light and fluffy.
Refrigerator Storage
- Store Oreo Cheesecake Cookie Cups in an airtight container.
- They can last up to 3 days in the refrigerator.
- Place parchment paper between layers if stacking to prevent sticking.
Freezing Oreo Cheesecake Cookie Cups
- Freeze in an airtight container or heavy-duty freezer bag.
- They can be stored for up to 4 weeks.
- Thaw overnight in the refrigerator before serving.
Reheating Oreo Cheesecake Cookie Cups
- Oven: Preheat to 350°F (175°C) and warm for about 5-10 minutes.
- Microwave: Heat individually on low for about 15-20 seconds.
- Stovetop: Place on a non-stick skillet over low heat until warmed through.
Frequently Asked Questions
How long do Oreo Cheesecake Cookie Cups last?
These dessert cups are best enjoyed fresh but can be stored in the refrigerator for up to 3 days or frozen for up to 4 weeks.
Can I customize the Oreo Cheesecake Filling?
Absolutely! You can add different flavors like mint or peanut butter to change up the taste of your Oreo Cheesecake Cookie Cups.
What if I can’t find black cocoa powder?
You can substitute with additional Dutch-processed cocoa powder. However, using black cocoa will give a deeper flavor reminiscent of Oreos.
Are Oreo Cheesecake Cookie Cups suitable for parties?
Definitely! These treats are perfect for gatherings, offering a delightful combination of flavors and an impressive presentation that guests will love.
Can I make these ahead of time?
Yes! You can prepare the cookie cups a day in advance and fill them with cheesecake right before serving for optimal freshness.
Final Thoughts
Oreo Cheesecake Cookie Cups are a delectable treat that combines rich chocolate cookies with fluffy cheesecake filling. Their versatility allows for customization, whether you’re adding toppings or variations to suit your taste. Try this recipe today, and impress friends and family with these delightful mini desserts!
Oreo Cheesecake Cookie Cups
- Total Time: 33 minutes
- Yield: Makes approximately 20 cookie cups 1x
Description
Indulge in the delightful experience of Oreo Cheesecake Cookie Cups, a perfect dessert crafted for Oreo lovers. These mini cheesecake treats feature a rich chocolate cookie base paired with a light and creamy Oreo cheesecake filling, creating a heavenly bite-sized dessert that’s ideal for any occasion. Easy to make and customizable, they’re perfect for parties, gatherings, or simply enjoying at home. Impress your friends and family with these irresistible sweet treats that blend the best of both worlds—cookies and cheesecake.
Ingredients
- 2 cups all-purpose flour
- ¼ cup Dutch-processed cocoa powder
- ½ cup granulated sugar
- 1 cup unsalted butter
- 8 oz cream cheese
- 1 cup heavy whipping cream
- ¾ cup Oreo cookie crumbs
Instructions
- Preheat the oven to 350°F (175°C) and grease two muffin tins.
- Beat butter and sugars until fluffy, then mix in eggs and vanilla.
- Combine dry ingredients and fold into wet mixture.
- Scoop dough into muffin tins, press down gently, and bake for 10–13 minutes.
- Create wells in each cookie after baking and cool completely.
- Whip the cream until stiff peaks form; beat cream cheese with sugar until smooth.
- Fold in Oreo crumbs and whipped cream, then fill cooled cookie cups.
- Refrigerate for 1–2 hours before serving.
- Prep Time: 20 minutes
- Cook Time: 13 minutes
- Category: Dessert
- Method: Baking
- Cuisine: American
Nutrition
- Serving Size: 1 cookie cup (45g)
- Calories: 150
- Sugar: 9g
- Sodium: 120mg
- Fat: 9g
- Saturated Fat: 5g
- Unsaturated Fat: 3g
- Trans Fat: 0g
- Carbohydrates: 15g
- Fiber: 1g
- Protein: 2g
- Cholesterol: 30mg

